How to Install Solenoid Valve
In exploring early excavator and heavy equipment installations, the solenoid valve is the key component we have to mention. This small but important device plays a vital role in the operation of machinery and equipment. It is the "heart" of the equipment, controlling the flow of the hydraulic system and ensuring that the machine performs its tasks efficiently and accurately.
Solenoid Valve Installation Instructions
In excavators and heavy equipment, solenoid valves are key hydraulic control components that regulate the flow and pressure of the hydraulic system, ensuring that the equipment is able to perform tasks efficiently and accurately.
Step 1: Preparation
Ensure that the excavator or heavy equipment is in a safe condition by turning off the power and unplugging all cable connections.
Check that the model, specifications and dimensions of the equipment and diesel solenoid valve match to ensure that they are suitable for your equipment.
Step 2: Selecting the mounting location
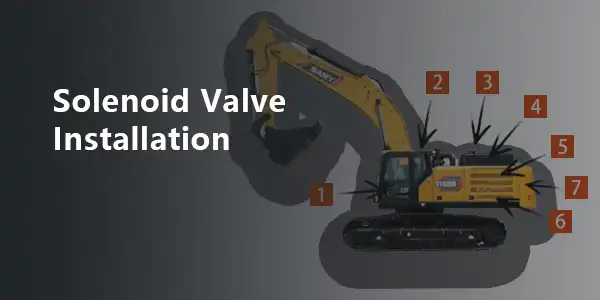
Carefully select a mounting location for the solenoid valve, which should normally be near the hydraulic system and easy to maintain.
Ensure that the installation location is free of any obstacles to ensure the smooth installation and operation of the solenoid valve.
Step 3: Connect the piping
Connect the hydraulic lines to the inlet and outlet of the solenoid valve. Make sure the connections are secure to avoid oil leaks and looseness.
Carefully inspect the connection ports for any damage or foreign objects and clean the piping if necessary.
Step 4: Secure the solenoid valve
Secure the solenoid valve firmly in its mounting position using an appropriate fixing device.
Ensure that the solenoid valve is securely mounted to prevent it from wobbling or falling off during operation of the equipment.
Step 5: Connecting Cables
Properly connect the cable to the control port of the solenoid valve according to the electrical connection requirements of the solenoid valve and the equipment.
Be careful to avoid excessive bending or squeezing of the cable to avoid damage to the cable.
Step 6: Testing and Commissioning
After completing the installation, carry out a full system check to ensure that all connections and fixings are correct.
Using the unit's test program to make a solenoid valve test and check that it works as expected.
Step 7: Operation and Monitoring
After confirming that all tests have been passed, restart the unit and monitor the solenoid valve's performance in actual operation.
Periodically check the operating status of the solenoid valve to ensure that there are no abnormalities or malfunctions in its operation.
Common Errors and Solutions When Installing a Solenoid Valve
Improper installation of solenoid valves can cause improper operation of the equipment, which in turn affects the solenoid valve to control the hydraulic system to the diesel starter motor output power, so it is necessary to understand the common errors in the installation of solenoid valves and solutions.
1.Poor piping connections
This is one of the most common mistakes during installation. Poor piping connections can lead to oil leakage from the hydraulic system, affecting the hydraulic performance of the equipment and even causing system failure.
Solution:
Ensure that the proper line connections are used, choosing the right size and material according to the equipment specifications.
Use appropriate torque tools to tighten connections to avoid over-tightening or over-loosening.
Carefully inspect the piping connections before installation to ensure that they are not damaged or cracked.
2.Wrong cable connection
The cable connection of the solenoid valve is the key to the electrical control. If wired incorrectly, the device may not respond properly or act inaccurately.
Solution:
Carefully read the electrical connection instructions for the solenoid valve and equipment to ensure proper connection.
Use the correct cable specification and avoid using aged, damaged or mismatched cables.
Disconnect power to the equipment before connecting to avoid electric shock and electrical malfunction.
3.Improper solenoid valve mounting position
The installation position of the solenoid valve determines its effectiveness in controlling the hydraulic system. Improper installation position may result in slow or unstable system response.
Solution:
Select the proper mounting position according to the hydraulic system design of the equipment.
Ensure that there is sufficient space between the solenoid valve and other equipment components to avoid interference and collision.
Before installation, carefully check whether the installation position is level and firm to ensure that the solenoid valve is fixed and stable.
 Track Your Order


